Night in nature. How to assemble a tent?
We independently test the products and technologies that we recommend.

Before you put up a tent, you need to find a suitable place for this. And here are a couple of tips on this.
Firstly, when choosing a place to set up a tent, it is worth looking for a flat area. It needs to be cleaned of stones, branches and other objects that can interfere or, worse, damage the bottom of the tent. Also, it is not necessary to assemble a tent in pits and hollows. Otherwise, during the rain, you will most likely be flooded.
Be sure to put a tent at a distance of at least 3 metres from the fire to avoid sparks falling on the tent. Plus, make sure that no smoke gets inside, otherwise the walls will smoke.
Do not forget to take into account which side of the sun so that its early rays do not catch you by surprise and wake you up. In addition, in the sun, your shelter will turn into a steam room, so it is better to choose a place to set up a tent in the shade.
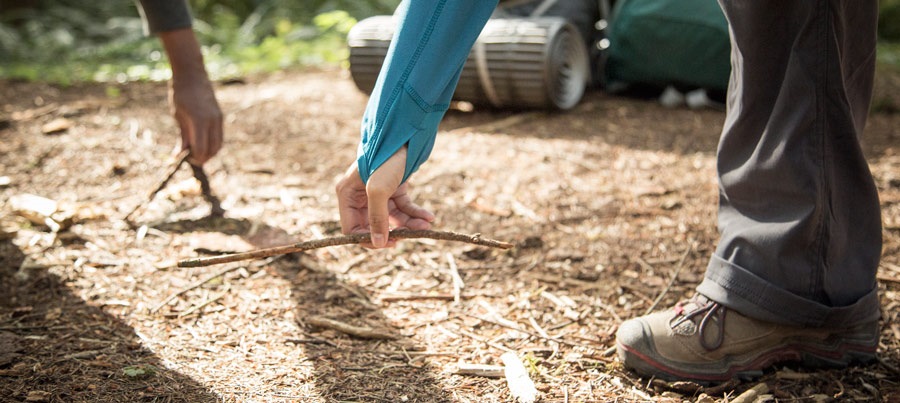 |
| Prepare the place where you will set up the tent. |
Instructions for assembling the tent
There are a huge number of types of tents, but perhaps the most common are double double–layered. Below are a few steps that will help you install such a shelter if you do not have a tent assembly scheme with you. If you have a different type of tent, it doesn't matter. The assembly principle is about the same for most, the differences can only be in the number of arcs and the way they are connected. So you can safely use this instruction as a hint.
Step one. It is recommended to have a barrier between the bottom of the tent and the ground. Such a barrier will protect the bottom from moisture penetration. Therefore, if there is a piece of tarpaulin at home, then take it with you. Fold the tarpaulin into a shape that repeats the shape of the tent, but a slightly smaller area and lay it on a flat surface.
Step two. Lay out and check the presence of all the components of the tent. Most modern tents are made of lightweight nylon, several bonded fiberglass arcs and pegs, while older models often have completely separated arc elements and heavier fabrics. Anyway, you can't do without an awning and arches, and the process of installing a tent, usually, is not much different.
Step three. We proceed directly to the installation of the tent. To do this, decide where the doors and windows will be directed, so as not to rearrange it later, and put the tent on a tarpaulin.
Step four. Connect the parts of the arcs. In most modern double tents, two arcs are used, which intersect, forming an X-shaped frame. In larger tents, the skeleton may be more complex and have more components. Depending on the specific model, the arcs can be connected by ropes or have a threaded connection and numbering. There are also models in which parts of the arcs are marked with different colours. Carefully examine the arcs, put all their parts together and put them on top of the canvas.
 |
| Be careful with the arches of the frame – this is the most vulnerable part of the structure. |
Step five. Insert the arcs into the corresponding grommets, which are located at the ends of the inner tent. The next step is to attach the arches to the inner tent. For this, usually, plastic hooks are used.
 |
| Grommet for fixing arcs. |
Step six. Cover the inner tent with an outer awning that will protect you from rain and wind. Usually the awning is attached with the same grommets at the corners. Just be careful and make sure that the entrance to the tent coincides with the entrance of the inner tent.
Step seven. Adding stability. Now you need to fix the already assembled tent on the ground. To do this, pin the corners of the tent with pegs, and in case of wind, pull the storm braces. If you are camping overnight in an area with solid ground, then you may need something weighty to drive the pegs. However, do not apply too much force, otherwise you can bend them.
 |
| A securely fastened awning is a guarantee that the wind will not destroy the tent. |
Step eight. The installation of the tent is over. Now make sure that everything is properly secured, the pegs are driven in securely and there is no risk that bad weather will destroy your shelter at night.
It's time to go home
The rest time has come to an end and it's time to pack a camp. There are several practical tips on how to properly fold a tent in order to minimize the likelihood of trouble.
1. Even super-advanced models with excellent ventilation accumulate moisture under the floor or between the awning and the inner tent.Perhaps the most important rule is that before folding the tent, you need to let it dry if it gets wet after rain or morning fog. It is very important that this moisture does not remain before assembly, otherwise there is a risk of mold. On arrival home, lay out a tent in the yard and let it air out. So the probability of mold is reduced to zero.
2. Before you fold the tent, clean out all the dirt and debris from the inside. If the frame structure is strong enough, you can even lift the inner tent and shake out the garbage.
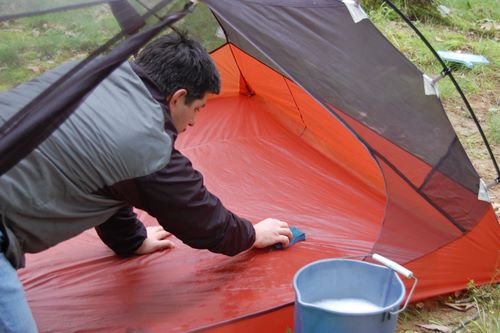 |
| Even a temporary house needs to be cleaned. |
3. It is not necessary to fold the tent the same way every time. This can lead to the fact that the canvas will begin to grind at the places of bends and holes will form. Let the awning be crumpled, but intact.
A few general tips for the operation of the tent
1. Develop the habit of checking the tent regularly. By doing this before the hike, you will be able to notice possible damage or loss of parts in advance.
2. Be careful with locks. Do not pull too hard if the lightning has jammed the awning. Instead, try to gently pull the stuck fabric out of the lock and only then try to unbutton the clasp. When the zipper has parted, carefully lift the slider up and try to fasten it again. If it continues to diverge, take a pair of pliers and gently squeeze the slider so that the upper and lower parts of it converge closer to each other. Do this trick very carefully so as not to overdo it and not spoil the zipper slider.
3. Leave your shoes outside or in the vestibule. Various dirt and pebbles from the sole can get on the floor, which in the future will most likely lead to damage to the canvas. In this regard, tents with a vestibule are much more practical since there is a place where you can store dirty shoes and other things.
 |
| Do not enter in dirty shoes! |
4. A tent is not a doghouse, so never leave your dog unattended in it. Sharp teeth and claws will definitely not benefit the canvas.
5. It is better to store the tent in a cool, dry place. But wet and hot places in the likeness of a basement, attic or boot of a car are not recommended to be used as a place to store a tent. But if there are no other options, then be sure to pack a dry tent in a plastic bag.
The best electric kettles with the function of selecting and maintaining a set water temperature.
Unusual camera angles and the opportunity to look down on the environment.
It is possible to cook a small amount of food for each day and provide a festive table for the arrival of guests.
In this article we will look at all types of sprayers for the garden and fields.
Optimal AMD processors for office work, games and video editing.


Articles, reviews, useful tips
All materials


