How to assemble a computer with your own hands: step by step instructions

We independently test the products and technologies that we recommend.

We also recommend reading the articles "Building a gaming computer for $500", "An advanced gaming computer for $800" and "An initial gaming computer for $ 300".
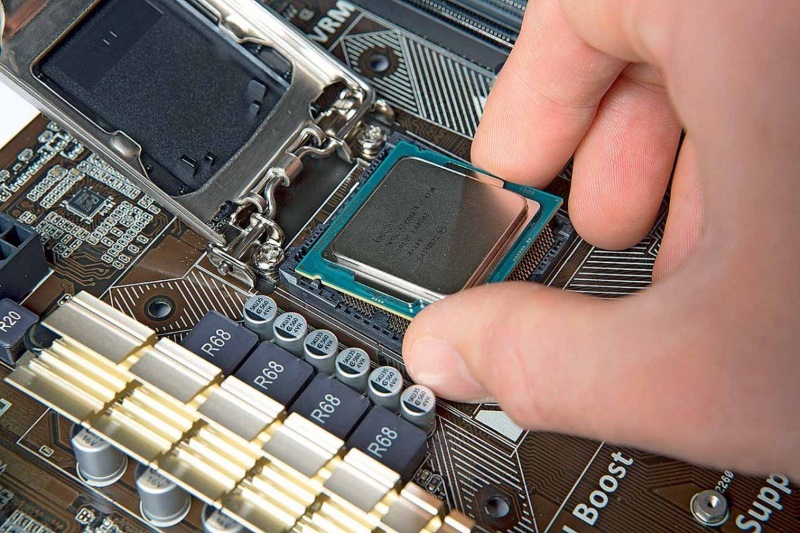
1. Start assembling the PC by installing the processor in the socket of the motherboard. In order not to scratch the table with metal elements on the back of the motherboard, put a cardboard box under it. In the case of the AMD platform, the socket is open by default, whereas Intel's is closed with a plastic plug that needs to be removed. Lift the latch lever to the right of the socket, carefully (so as not to damage the contacts) install the processor into the socket and lower the latch to the initial position (it will go tight, but it should be so).
 |
Read more"How to choose a processor for a computer?"and"How to choose a motherboard for a computer?".
2. It is not difficult to install the box cooler supplied with the processor. Thermal paste is immediately applied to its sole, and the fastening mechanism is uncomplicated. The AMD cooler is attached with a metal clamping bracket, and the Intel cooler is mounted on four plastic latches that need to be pressed hard until it clicks. In the end, do not forget to connect the power connector of the processor fan to the motherboard signed by CPU Fan. A large tower cooler and, moreover, a water cooling system is much more difficult to install. Before installation, carefully read (preferably twice) the complete instructions, and start the process by applying thermal paste to the processor (one drop the size of a dry pea is enough).
 |
3. Perhaps the simplest stage of PC assembly is the installation of RAM. Bend the latches at the ends of the DIMM slot, insert the memory module with the correct side (the slot on the bottom side of the strip is slightly offset from the centre (especially so as not to insert the other side) and press hard until it clicks. If there are four or eight memory slots on the motherboard, and you have only two modules, then install them through one slot to activate the dual-channel operation mode. Memory bars with high radiators may conflict with a large CPU cooler. You will either have to put the memory in the extreme slots, or raise the cooler fan higher.
 |
4. Now prepare the housing for the installation of other components: remove both side walls. Place the heaviest and bulkiest component – the power supply unit - first in the case. Depending on the housing model, the location of the PSU can be upper or lower. If the PSU is modular, then connect to it the number of cables necessary specifically for your PC configuration. If not modular, then fasten the extra wires with ties so that they do not get tangled under your hands.
 |
Read more"How to choose a computer case?"and"How to choose a power supply for a computer?".
5. The next step is to mount the motherboard into the PC case and connect the main cables to it. Insert the interface plug into the slot on the back panel of the case and, if necessary, the mounting posts for the motherboard (there may be ready-made non-removable ones). After that, place the motherboard itself in the case with the processor, cooler and RAM already installed. It is most convenient to hold it for the CPU cooler. Carefully screw the motherboard with screws to the pillars so that the textolite does not bend under the weight of other components in the vertical position of the PC. Connect two power cables to the motherboard – 20+4- pin and 4-pin (or bifurcated 4+4-pin), as well as complete case fans (alternatively, they can be connected directly to the PSU or to the rheobase). Also connect the case buttons to the motherboard (turning on and restarting the PC), light indicators (running PC and hard disk activity), as well as extension cords of audio jacks and USB ports on the front panel.
 |
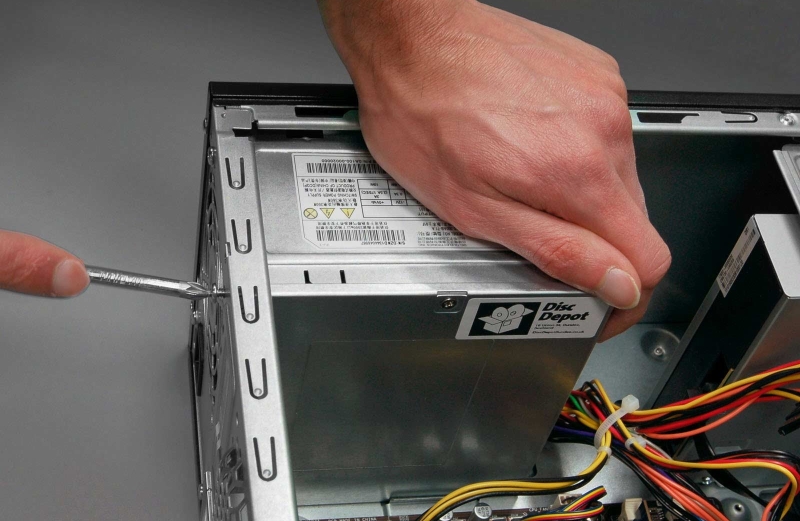
6. Attach solid-state drives and hard drives to the case. SSDs are now most often installed on the back of the case frame, that is, behind the motherboard. HDD are mounted using vibration-damping slides. If you have an old case and there are no slots for a 2.5-inch SSD, then it can be screwed only with one side to the holes of the 5.25-inch compartment, or even carefully placed in the case unfastened in the "socket" between the PSU wires. But it's better not to do this with HDD – it can break under the influence of its own vibration. Finally, connect the Molex power cable from the PSU and the SATA data cable to the disks (supplied with the motherboard), and then fasten them with ties or, if the length allows, lay them behind the back wall of the case so as not to interfere with air circulation.
 |
Read more"How to choose an SSD drive for a desktop PC and laptop?".
7. Install the video card last in the case. First, bend the latch of the PCI-E x16 slot on the motherboard, then install the vidyukha until it clicks, fix it strictly at a 90-degree angle with a screw and finally, if necessary, connect a 6- or 8-pin power cable (or two at once).
 |
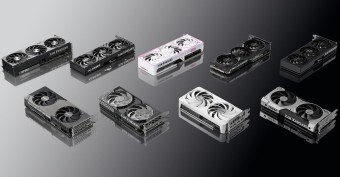
Read more"How to choose a graphics card for a computer?".
8. After installing all the internal components of the PC, do not rush to close the case covers. Connect the monitor (if there is a discrete graphics card, you need to connect to its video outputs, and not to the same ports of integrated graphics on the motherboard), keyboard and mouse and run a test run: maybe you forgot to connect some inconspicuous wiring or simply got a defective product.
 |
9. If the PC has started, passed the initial BIOS test and displays the message "No bootable device" (or similar) on the monitor screen, you can start installing the operating system. Until you have time to purchase a licensed copy of Windows, you can temporarily use the trial version or make a choice in favor of the free Ubuntu OS.
 |
10. After installing the OS and device drivers, do not be lazy to download the application to check the temperature of PC components – HWiNFO. The normal temperature of the processor in idle time is up to 40 °C, under load (for example, during a resource–intensive game) – up to 80 °C. For a graphics card – up to 55°C and 80°C, respectively. For disks – up to 40°C and 60°C. In case of exceeding the norm, it is first of all necessary to check whether everything is well assembled (for example, whether the processor cooler is installed exactly), and then think about buying additional case fans. If there is no overheating or it has been eliminated, then congratulations – you have successfully assembled your first PC!
Large diagonal TVs provide maximum immersion in what is happening on the screen.
With powerful "pneumatics" you can shoot not only for entertainment.
A popular proverb says: there is no such thing as too much RAM.
The best models in terms of performance, functionality and price.
Models with a capacity of 1 liter allow you to give hot tea to a company of 2-3 people.


Articles, reviews, useful tips
All materials