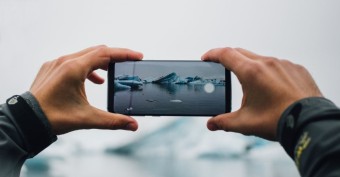
An introduction to mobile photography: taking high-quality photos with your smartphone

We independently test the products and technologies that we recommend.

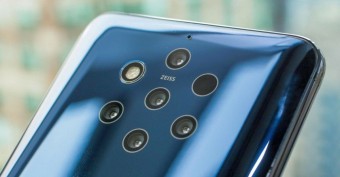
Before distributing tips on taking pictures on a mobile phone, we recommend reading the review material "The camera in a smartphone: all the important features and characteristics of built-in lenses".
So, let's start small.
1. Wipe the lens before shooting
When removing a smartphone from a jeans pocket or a women's handbag, fingers tend to leave marks on the front lens of the camera lens. How many potential masterpieces were sent to the landfill because of this. Photos through dirty glass are cloudy and blurry, and the focus often blurs because of this. It is enough to wipe the camera with a soft cloth and the problem is reduced to nothing. The best way to care for the front lens of the lens is microfiber cloths (including those used for cleaning glasses).
2. Shoot horizontally
With rare exceptions , try to take photos with your smartphone in landscape orientation. Firstly, such material is much more convenient to view on a TV or monitor screen(without wide empty stripes on the sides of the frame). And secondly, horizontal photographs are closer in spirit to human vision.
The vertical layout of the frame is usually used in the portrait genre of photography, it is also popularized by social networks (for example, stories on Facebook or Instagram).


3. Consider lighting features
A sufficient amount of light is at least half the success on the way to getting beautiful artistic photographs. The guarantee of a good result is shooting with your back to the sun. But even in backlight (“on the forehead” of the light source), with due skill, you can make spectacular shots (for example, the silhouette of a model).
 |
| Pictures in backlight (against the light source) captivate with a special charm. |
Indoors, it is best to rely on natural light from a window. Artificial light sources are most often not able to provide sufficient illumination, which is why artifacts appear in the photo in the form of noise and loss of frame detail. Also, do not overdo it with the built-in flash - the hard light from it draws ugly highlights and darkens the background too much. The use of “puff” is justified, if necessary, to take an important shot in the dark and in some portrait scenes.
The softest transitions between objects in the frame can be obtained when photographing in “mode time”. These are small segments in anticipation of sunrises or sunsets and immediately after them.
 |
| The most “delicious” and juicy photos are obtained when shooting in “peak time”. |
The concept of "mode time" came from "adult" photography - the true gurus of their business love such light for the uniform brightness of the sky and objects in the picture.
4. Compose your shot correctly
When building a frame, you must be guided by several important criteria. The first of these is the rule of thirds. According to him, the frame is divided by imaginary lines horizontally and vertically into thirds. The main compositional details are at the points of intersection of the lines. It is easier for the human eye to focus on one of the intersection points than on the center of the image. You can turn on the virtual grid in the camera settings of any smartphone.
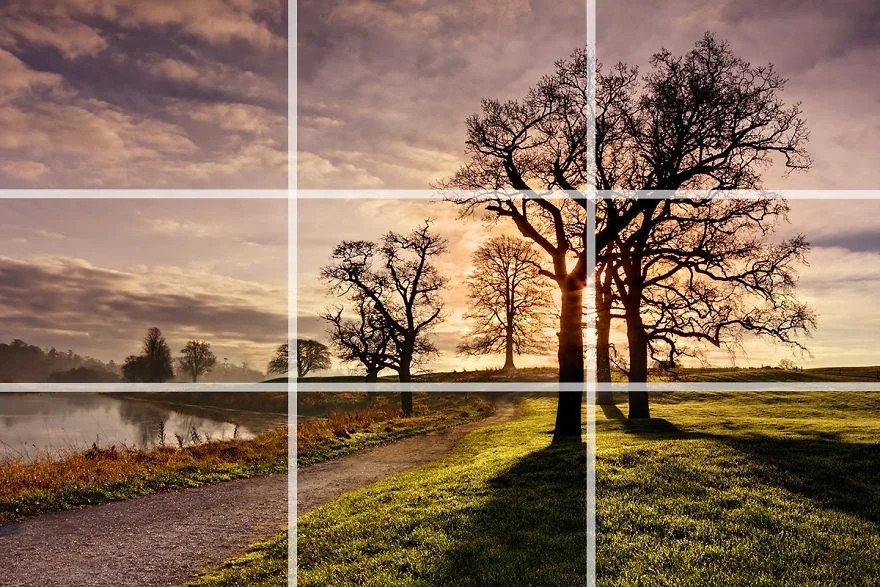 |
| Virtual third lines on the smartphone screen will help you compose the shot correctly. |
An equally important aspect is the correct framing of the photo. If architecture is in the scope of the camera lens, try to put the entire building in the picture. Try not to crop people, objects from the environment and important objects in the frame. Understanding the basics of composition is a serious step towards successful shots in the mobile photography genre.
5. Hold your smartphone firmly
While shooting, hold the smartphone firmly in your hands in order to avoid blurring the photo. In particular, the cameras on board the "mobile phones" sin this in low light conditions. In flagship smartphones, optical image stabilization systems help to avoid blurring. Simpler models use the services of less efficient digital stubs.
 |
| The optical stub compensates for small camera shifts and helps to obtain a smooth video sequence without jerks and shaking of the picture. |
With insufficient hand strength and shooting, for example, night landscapes, mini tripods come to the rescue of the photographer. You can also be smart about fixing your smartphone firmly using improvised means: you can lean the gadget on a stone, lean it against a wall, place it on a table, etc.


6. Use manual photography settings
The flexibility of the shooting process on mobile phones has taken a big step forward. In the camera menu of many smartphones, you can change the shutter speed, ISO value, adjust the white balance and adjust the exposure. What is it and what does it “eat” with? Let's take a quick look.
In simple terms, shutter speed is the speed at which the camera captures the moment of the picture. A short shutter speed allows you to take a clear photo of a fast-moving object, a long shutter speed captures changes in the photo over a certain period of time. It is customary to shoot dynamic scenes with sufficiently good ambient light at shutter speeds of 1/500 s and higher, and night shots at slow shutter speeds up to 30 s.
The shorter the shutter speed, the less light has time to hit the camera matrix. This means that in low light it may be necessary to raise the ISO sensitivity threshold. Raising the ISO bar too high is not recommended in order to avoid the appearance of noise in the picture. In daylight, set the minimum ISO threshold, in cloudy weather - 200-400 units, when shooting indoors - 400-800 units.
White balance determines whether colors are displayed correctly depending on the lighting conditions. In the manual settings section of photography, WB is most often presented in the form of presets for sunny and cloudy weather, fluorescent lighting and light from an incandescent lamp.
 |
| The white balance menu usually has several presets for different lighting conditions. |
Finally, correct exposure is a combination of shutter speed, lens aperture, and ISO that produces the photo "what you need"(not dark and not overexposed). In some cases, the camera's automation makes mistakes and the frames are overexposed or filled with shadows. Make a small adjustment to the exposure and the picture will be "chocolate".
7. Use AI “enhancers” and HDR mode
Artificial intelligence is on guard for improving images - a new word in mobile photography. AI algorithms recognize shooting scenes and automatically “twist” the settings for them. As a result, the grass in landscape shots looks greener, the sky looks bluer, and the faces of people in portrait photography are more beautiful.
In scenes with complex lighting changes , the HDR mode is a breath of fresh air. Expanding the dynamic range allows you to brighten too dark areas and shade too bright areas, thus providing high-quality detail throughout the image field. The main thing is not to overdo it with the HDR effect.


8. Don't be afraid of non-standard angles
The vast majority of pictures on a smartphone (and on a camera) are taken from eye level. Don't be afraid to experiment - place your phone near the floor to look at the object from a lower angle, close to the car roof for a foreground reflection effect, photograph something from above.
 |
| Sometimes you can see something from a different angle simply by looking up. |
With the advent of multiple “peepholes” on smartphone cameras, changing the perspective has become even easier. From now on, the same scene can be transferred to the multi-module constructions of the main camera in various ways: from the usual viewing angle, using the services of an ultra -wide or telephoto lens, to a macro lens.
9. Learn to edit your photos
Even the most beautiful, it would seem, photo on a smartphone will look even more beautiful if you “comb” it in a photo editor. Fortunately, a lot of programs for post-production of footage (Snapseed, mobile Adobe Photoshop, etc.) are presented in the "Google Market" and "Apple" offer store.
In the image editor, options for cropping images, adjusting brightness and contrast, changing perspective and white balance, all kinds of filters and effects are available. All in order to get the most out of photography.
10. Try to avoid the following:
There are some taboos in the mobile photography genre. For example, digital zoom, which significantly reduces image quality. It is also not recommended to use a flash when shooting landscapes, overload the frame with unnecessary details, crop people and important objects in photos (as mentioned above). Well, make sure that your fingers do not cover the lens when holding the smartphone in your hand.
Good luck with your photos on your smartphone!


Articles, reviews, useful tips
All materials