
Основи фотографії: базові поняття, які має знати кожен

Ми незалежно перевіряємо товари та технології, які рекомендуємо.

Базові параметри фотозйомки не змінювалися ще з часів старої-доброї плівкової фотографії. Це фокусна відстань оптики, витримка, діафрагма та глибина різкості, світлочутливість, баланс білого. Окремо варто згадати формати файлів RAW і JPEG. Почнемо по порядку.
1. Фокусна відстань
У технічному плані фокусна відстань — це відстань від оптичного центру об'єктива до площини матриці фотоапарата. Параметр вимірюється в міліметрах (наприклад, 35 мм, 24–70 мм) і визначає кут огляду об'єктива. Чим менше фокусна відстань, тим більшим є поле зору оптики, і навпаки. Ну а від кута огляду залежить масштаб об'єктів у кадрі.
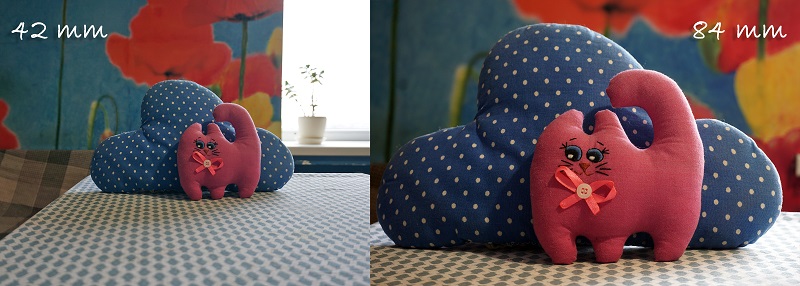
Фокусна відстань жорстко прив'язана до розміру матриці камери — за точку відліку прийнято використовувати 35-міліметровий сенсор, який встановлюється у повнокадрових фотоапаратах. Якщо у вас є камера з датчиком APS-C, фокусну відстань необхідно помножити на коефіцієнт кроп-фактора: як правило, 1.5x, а для фотоапаратів Canon — 1.6х. Для бездзеркалок із сенсором Micro 4/3 кроп-фактор становить 2х (тобто умовний об'єктив Panasonic 42.5mm f/1.7 ASPH OIS матиме еквівалентну фокусну відстань 85 мм).
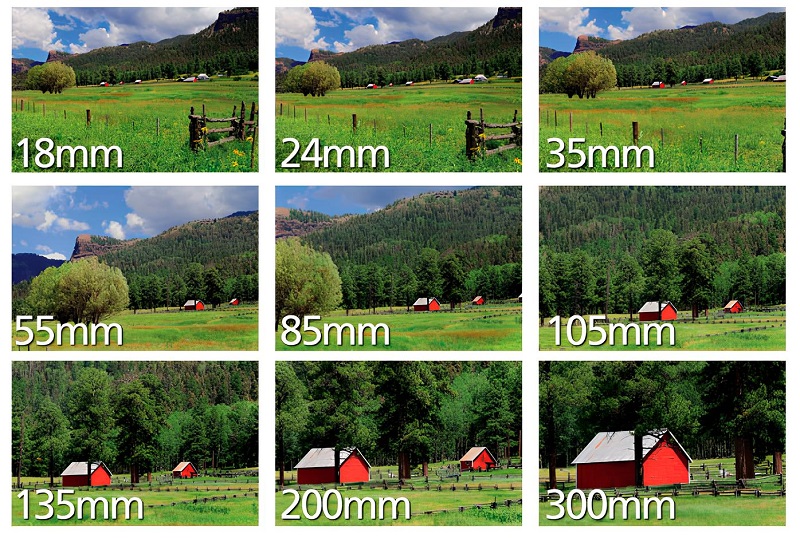
Чим ширша фокусна відстань об'єктива, тим більше можна вмістити в кадр. А чим вона більша — тим більшими виглядатимуть об'єкти на знімку. Умовно фокусні відстані можна розділити на такі підкатегорії:
- приблизно до 18 мм — надширококутна оптика; при зйомці в кадр потрапляє максимум навколишнього простору, але зображення буде мати характерні геометричні спотворення (центр сцени наче «випнутий» до глядача, тоді як краї візуально «витягнуті» вдалину);
- від 18 до 35 мм — ширококутна оптика; цей діапазон чудово підходить для зйомки ландшафтів, пейзажів, архітектури, інтер'єрів приміщень;
- від 35 мм до 70 мм — так звана «нормальна» оптика; при зйомці на таких фокусних відстанях забезпечується кут огляду, максимально наближений до поля зору людських очей;
- від 70 до 135 мм — портретна оптика (а також деякі макрооб'єктиви для зйомки великим планом); у цьому діапазоні достовірно передається об'єм під час зйомки людей;
- понад 135 мм — дальнобійна оптика (телеоб'єктиви); великі фокусні відстані стануть у пригоді для зйомки полохливих тварин, об'єктів на значній відстані, спортивних заходів тощо.


2. Витримка
Основа фотографії — це світло, яке проходить через об'єктив і фіксується на матриці камери. Так ось витримка визначає тривалість впливу світла на сенсор зображення. Витримку ще називають часом експонування знімка — це той проміжок часу, за який фотоапарат робить кадр.
Витримка вимірюється в секундах і частках секунди. Короткі витримки на кшталт 1/500 с або 1/4000 с використовують для зйомки рухомих об'єктів у кадрі, довгі (1/2 с, 30 с) — для фіксації нерухомих об'єктів і зйомки в умовах слабкого освітлення. Зазначимо, що дробові значення витримки в меню фотоапарата і на регулювальних дисках зазвичай записуються без чисельника дробу (1/100 с позначається просто як 100), а якщо рахунок витримки ведеться на цілі секунди — це позначається значком ” (2 с записується як 2”).
Витримка впливає на кількість світла, що потрапляє на матрицю, і на «замороження» рухів у кадрі. У яскравий сонячний день на вулиці сенсор зображення отримує достатньо світла для правильного експонування знімка буквально за частки секунди. А ось за слабкого навколишнього освітлення витримку потрібно подовжити, інакше кадр вийде недоекспонованим (темним). Щодо рухомих об'єктів — чим швидше вони переміщуються в кадрі, тим коротшою має бути витримка, інакше є ризик отримати змазане зображення. Змазатися може і весь знімок загалом — це трапляється через тремтіння камери в руках фотографа.

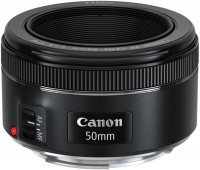
Тому існує формула для розрахунку безпечної витримки залежно від фокусної відстані об'єктива:
T = 1 / (f * K),
де f — фокусна відстань, а K — кроп-фактор фотокамери.
Для умовного об'єктива з фокусною відстанню 50 мм у поєднанні з повнокадровою камерою безпечна витримка становитиме 1/50 с, а для нього ж на кропі APS-C — 1/75 с (1 / (50*1.5)).
Частково захистом від тремтіння виступають системи оптичної стабілізації зображення в об'єктивах і матричної стабілізації у фотоапаратах. За наявності таких систем безпечну витримку можна сміливо подовжити на пару-трійку ступенів без ризику отримати змазане зображення.


3. Діафрагма, світлосила і глибина різкості (ГРИП)
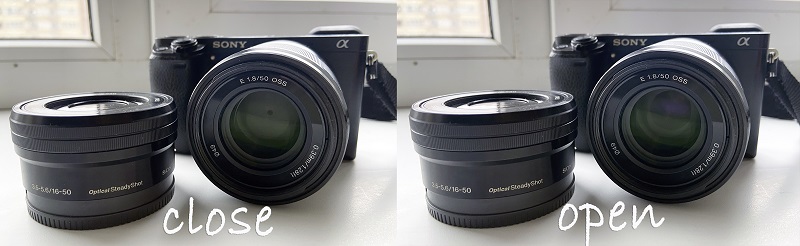
Діафрагма — це регульований отвір в об'єктиві, який контролює кількість світла, що потрапляє на матрицю. Як правило, діафрагма є поворотним диском, що складається з кількох металевих пелюсток. Це поняття ідентичне до світлосили — ступінь відкриття діафрагми всередині об'єктива безпосередньо впливає на значення світлосили, яка записується у вигляді f/2.0, F2.0 або F1:2. Чим менше значення відносного отвору діафрагми, тим більше вона відкрита (тобто f/1.8 значно «світліша», ніж f/5.6). Детально про це розказано в окремому матеріалі «Що таке світлосила оптики і на що вона впливає».
Від ступеня відкриття діафрагми безпосередньо залежать доступний діапазон витримок і глибина різкості зображуваного простору (ГРИП). Чим більше відкритий отвір діафрагми — тим коротші витримки можна встановлювати, що буває вкрай важливо при зйомці динамічних сцен та в умовах недостатнього освітлення. Що ж до глибини різкості, при підвищенні світлосили вона зменшується. Зйомка з малою ГРИП на значеннях світлосили на кшталт f/1.4 або f/1.8 візуально відокремлює об'єкт на передньому плані від фону, що незамінне в портретному жанрі фотографії, при предметній зйомці та в інших подібних ситуаціях. Збільшити глибину різкості можна шляхом прикриття діафрагми (до f/4, f/5.6 і більше).
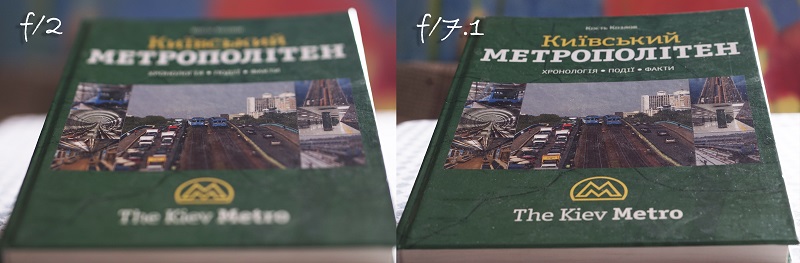
тоді як при прикритій діафрагмі різким буде весь знімок (права частина кадру).
Серед об'єктивів із фіксованою фокусною відстанню світлосильними вважаються моделі з максимальною діафрагмою f/2 і менше. А в категорії зум-об'єктивів такими є моделі зі світлосилою f/2.8.


4. Світлочутливість (ISO)
В одиницях ISO було прийнято вимірювати чутливість фотоплівки до світла. Власне, звідти цей параметр і перейшов у цифрові камери. Загалом — це рівень чутливості матриці фотоапарата до світла. Для будь-якого сенсора зображення вказується робочий діапазон ISO (наприклад, від 100 до 25600 одиниць). У багатьох моделях ISO можна розширити як у менший, так і в більший бік програмними засобами, однак на практиці це загрожує появою артефактів на знімках.
Як ми вже з’ясували вище, кількість світла, яке потрапляє на матрицю, визначається витримкою та діафрагмою. Залежно від їх значень світло підсилюється для отримання правильно експонованого зображення. Ступінь цього підсилення у цифровому вираженні й відображає чутливість ISO. Правило тут просте — чим менше значення ISO, тим якіснішим буде знімок. Підвищення світлочутливості тягне за собою появу на фотографії артефактів шуму — набору пікселів випадкової яскравості та кольору.
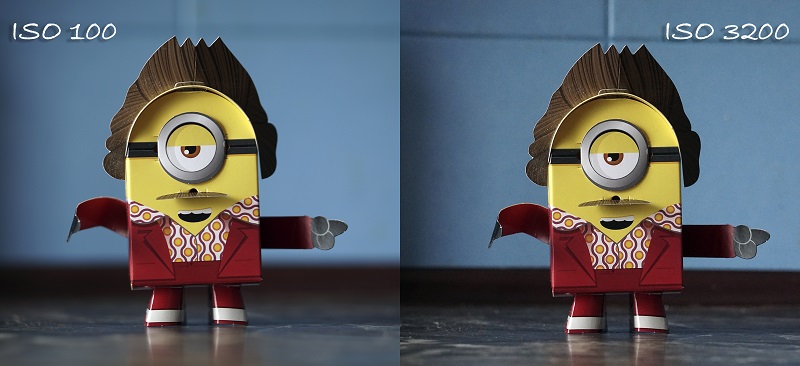
(це чітко видно при сильному наближенні).
У сонячну погоду найкраще встановлювати мінімальні значення світлочутливості: від 50 до 100 одиниць ISO. У похмурий день можна підняти ISO до 200–400 одиниць, у приміщеннях зазвичай доводиться виставляти чутливість на рівні від 800 до 3200 одиниць. У переважній більшості це верхні значення для отримання чистих від шумів знімків, але в топових повнокадрових камерах ISO дозволяється «піднімати» і більше.
Під час зйомки зі штативом або зі спалахом візьміть за правило виставляти мінімальні ISO.


5. Баланс білого
Від балансу білого залежить достовірність кольоропередачі. Чому ж параметр так називається? Справа в тому, що справжні кольори об'єктів проявляються при їх освітленні білим світлом. Якщо ж джерело світла не біле — кольори на знімку починають спотворюватися. Налаштування балансу білого усуває сторонні відтінки та забезпечує реалістичну кольоропередачу.
У переважній більшості ситуацій автоматичний вибір правильного балансу білого виконується успішно камерою. Проте іноді автоматика не спрацьовує або помиляється. У таких випадках можна скористатися стандартними передвстановленнями: сонце, похмура погода, лампа денного світла або лампа розжарювання тощо. У просунутих фотоапаратах можна навіть показати камері джерело світла та виставити баланс білого за ним або за білим аркушем паперу, але таке налаштування цікавить переважно професійних фотографів.

Зазначимо, що налаштування ББ — це виправний параметр. Для цього достатньо знімати у форматі RAW. Правильний баланс можна виставити у будь-якому конвертері за кілька кліків мишкою. Однак, щоб не витрачати час зайве на етапі постпродакшну, найкраще подбати про встановлення балансу білого безпосередньо під час зйомки.
6. RAW і JPEG
Оскільки ми торкнулися формату RAW, варто коротко розповісти про нього. RAW — це «сирий» формат, який по суті є цифровим негативом. Він містить максимум інформації із датчика зображення камери. Знятий матеріал у RAW обов’язково потребує постобробки у спеціалізованих редакторах (Photoshop, Lightroom тощо). Головна перевага формату — RAW надає широкі можливості для корекції вихідних файлів, включаючи освітлення або затемнення знімка, кольорокорекцію, чіткість і деталізацію.
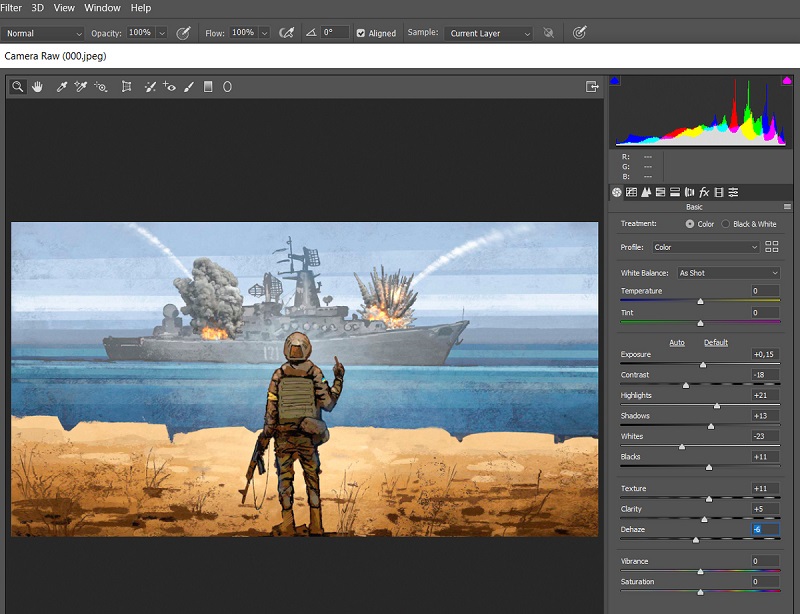
Максимум даних можна отримати з RAW-формату знімків,
однак за бажання можна спробувати підкоригувати й JPEG-файли.
Після обробки RAW-файли стискаються у звичні формати зображень, одним із яких є популярний JPEG. Якщо ви не плануєте займатися кропіткою постобробкою знімків, можна одразу вести зйомку у форматі JPEG. Це продукт внутрішньокамерної обробки кадрів. Він займає значно менше місця та економить простір на флешці, а під час серійної фотозйомки у JPEG буфер камери вміщує набагато більше кадрів. Знімки в цьому форматі можна одразу публікувати у соцмережах, але у плані можливостей обробки вони суттєво поступаються «сирому» RAW. Виправляти фото у JPEG при явно неправильних налаштуваннях камери — майже безглузде заняття, тоді як у RAW більшість проблем вирішуються без втрати якості знімка.


Статті, огляди, корисні поради
Усі матеріали


